Costume Arrow Tutorial
It seems impossible to find the perfect arrows for your costume at the store, even if you pay a fortune. And nothing wows people out like real, handmade arrows. Arrows have a mystique about them that seems to scare people from trying to make them, but they're incredibly simple and cheap to make. They look so impressive when you finish them, and you never have to tell anyone how easy they were!
This tutorial is focused on making costume-safe arrows, so we are tipping them with soft, safe foam. Apart from that, though, these arrows are the real thing - if you tipped them with real tips, you'd have functional arrows (though admittedly not particularly durable or accurate ones - if you're really planning to shoot your arrows, PLEASE find a different tutorial).
In this tutorial I am going to make Lothlorien-elf-style arrows, but this method can be easily adapted for other styles.
The basic materials you will need are:
5/16 inch wooden dowels
Wood stain or other tint
Large feathers (3 per arrow)
Paint or dye for feathers (optional)
Hot glue or other glue
Fine string or embroidery thread
Craft foam
Tools you will need are:
Saw
Hand rasp or dremel
Craft blade and scissors
Paint brush
Glue gun (optional)
If you're wondering about the costs here, here's a quick breakdown, though prices will vary:
Dowels - 35 cents each
Wood stain - 2.00
Feathers - 1.50 per ten
Paint - 1.00
Glue - negligible
String/thread - 2.00
Craft foam - 85 cents (1 sheet)
I recommend making about a dozen arrows for a respectable quiver-full, so this works out to about 18 dollars for 12 arrows, or about a dollar and fifty cents per arrow. Try finding anything this nice in an archery shop for that price!
I go into a lot more detail below, but the basic steps are: trim your dowel, notch it, color it - trim your feathers, color them - glue feathers to dowel, wrap in thread - glue tip to arrow, paint. Not so hard now, is it?
The first step is to cut your arrow shaft (dowel) to the correct length. The right length depends on the length of your draw and so varies from archer to archer. To find the correct arrow length for you, stand with one arm stretched out beside you in a straight line with your shoulder. Now measure from the tip of your middle finger to the middle of your breastbone - that will give you the correct length for your shaft. | |
After you have trimmed your shaft, you need to nock it. (The nock is the notch in the feather end of the arrow that holds it on the bowstring.) On most arrows nowadays, the nock is actually a separate piece that is glued to the end of the arrow, made from a material such as horn or (modernly) plastic that is sturdier than the wood. However, you can make a nice-looking costume nock just by notching the end of the shaft. The nock should be about 1/4 inch deep. You can make the nock using either a 1/8 inch hand-rasp (the slow way) or a power tool such as a dremel (the fast way). |
 |
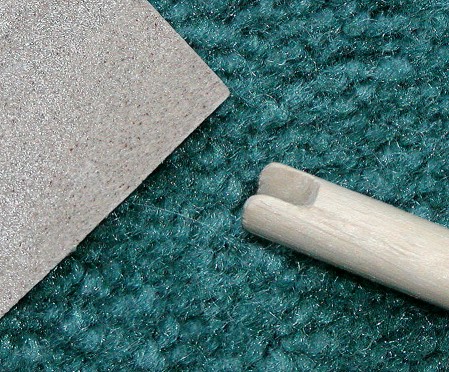 |
To make the nock look prettier, gently round the corners with a bit of fine sandpaper. You can also give your whole shaft a light sanding to smooth out any rough bits. |
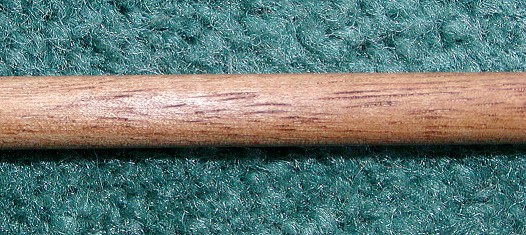
Now, assuming you don't want the natural color of the wood, you need to tint your shaft. Depending on the look you're trying to achieve, you can use a sheer color such as wood stain or an opaque color such as paint. There are also more creative options for adding color - for instance, the arrow in this tutorial was tinted by being rubbed well with brown wax shoe polish! |
 |
 |
If you want to make the nock look as if it is a separate piece, paint it a different color. |
Now let's go to work on our feathers. (The 'fletchings' - oooh, terminology.) Make sure you buy the right kind of feathers. You don't want the little soft fluffy sort - you want large, stiff flight feathers. And before you get any bright ideas about using some feathers you picked off a dead bird in the wild, remember that using feathers from endangered species is illegal! Most craft stores sell packs of the large feathers. There's usually at least one unuseable feather in every pack, so it doesn't hurt to pick up an extra pack. | |
Okay, technical note here. If you don't want to read the technical bit, skip to the next step. Everyone else - lay your feathers out top-side-up and look at them. See how on some feathers the wide side is to the left of the center vane, and on other feathers it's to the right? These are left-handed and right-handed feathers. They catch the wind differently, so for an arrow to fly straight it needs to be fletched with all left-hand or right-hand feathers - never mix both on one arrow. Why am I telling you this if you're never planning on actually firing your costume arrows? Because if you mix the feathers, every know-it-all who looks at your arrows will kindly inform you of your mistake, which gets really tiring after a while. So for sanity's sake, separate your feathers now. | |
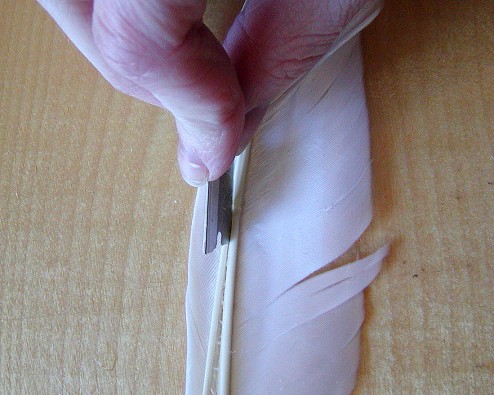
Okay, everyone's back with me now, right? Now we're going to split our feathers. The easiest way to do this is to use a craft blade or razor blade to split them down the shaft. Use sense here and hold the feather ABOVE the blade, otherwise you're going to end up with split fingers. As the vane narrows it may be too thin to cut with the blade - you may want to just trim the barbs on the skinny side away from the vane with scissors. The fat side is what we will make our fletching from. The thinner you can trim the vane on your fletching, the better. |
 |
 |
Now, figure out the shape you want your fletchings to be and make a cardboard template. Here is mine, based on the Lothlorien arrows. Remember to hold your template up to your arrow shaft to make sure it is a good proportional size. You may have to adjust your template slightly to fit the size of your feathers. (The fletchings on the Lothlorien arrows are huge, much larger than usual - about 1/5 the length of the shaft.) Make your template 1/4 inch longer on either end than you actually want it - you'll see why in a minute. |
Use this template to trim your feathers to shape. The sharper your scissors, the easier this is - if you use dull scissors you'll just chew your feather up. |
 |
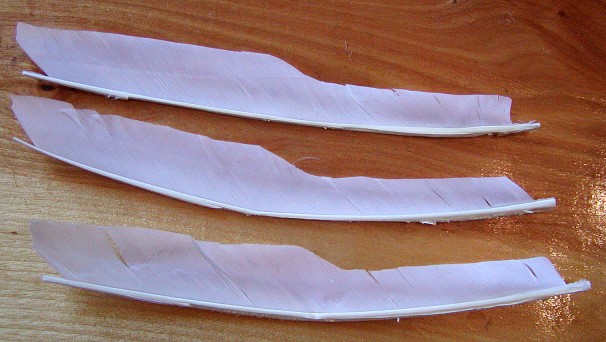 |
Using your scissors, nip out a quarter-inch of the barbs from the feather on each end of your feather, leaving only the naked vane. (I told you you'd see why.) |
I want white feathers for my arrows so I'm skipping this step, but everyone else, this is where you tint your feathers, if desired. You may be lucky enough to find feathers already the color you want, but if not you can buy white feathers and tint them. There are a number of ways to do this. Airbrushing and drybrushing are popular for patterned feathers (such as imitation eagle). For solid-colored feathers, I like to paint them with color. The trick here is liquid hand soap. Add just a drop to your pigment - feathers have natural oils which will cause your paint to bead up, but the soap breaks the oils and lets your color seep into the feather. Paint the feather on both sides. You can either paint your feather with a translucent pigment (such as colored ink or food coloring) or an opaque pigment (such as acrylic craft paint). In the case of opaque pigments, I find they look fake if just painted on, so I like to paint on a good coat on both sides of the feather, then blot it on a paper towel to get off most of the paint, giving it a soft, natural look. This photo shows fletchings that were tinted with food coloring - this photo shows feathers tinted using the paint/blot method. | |
Once your feathers are dry, you're ready to glue them to your shaft. You want three feathers per arrow, evenly spaced around the shaft and lined up at the same level. Make sure that you glue them far enough below the nock for your fingers to have room to grip the arrow. I use a thin layer of hot glue, but you can use other glue if desired. It doesn't have to be too strong, since the wrapping is what will really hold the feather on. (Some arrows do not have wrappings, in which case you will want to use good strong glue and skip the wrapping step.) |
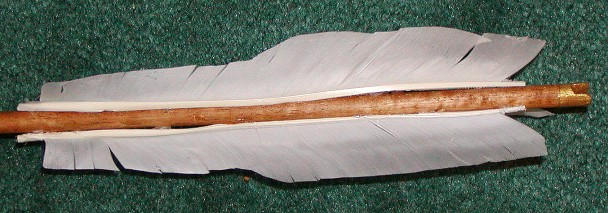 |
 |
Wrapping is the next step. You will want to use a fine string or embroidery thread - here I am using a pretty gold craft string I found in the beading section. Starting at the end of the arrow farthest from the nock, wrap the thread repeatadly around the vane you trimmed earlier. |
Once that is covered, wrap the thread around the feathers in a spiral - just slip it down between the barbs to lie snugly against the vane. |
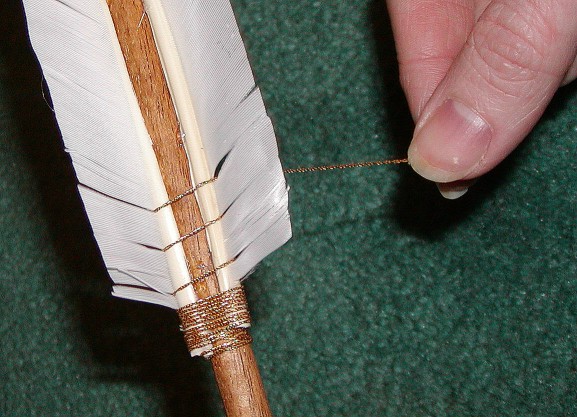 |
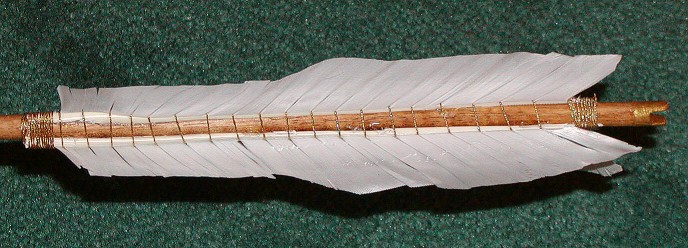 |
Finish up by wrapping the top portion of trimmed vane. Use a drop of elmer's glue to make certain the ends of the thread stay in place. Use your fingertips to smooth the feathers back into shape. |
Now you want to decide wether you want to tip your arrows or not. If you are not planning to ever take them out of your quiver, you can just leave them untipped. In that case, let me recommend the perfect spacer for holding your arrows inside - gutter grating. This is a flexible plastic shield used to keep leaves out of house gutters - you can buy a single piece very cheaply at most home centers. The ones I've found have a gridwork of holes the exact right diameter to hold 5/16 inch arrows - all you need to do is to cut out a piece and glue it inside your quiver. This way your arrows are held apart and don't rattle around and damage each other. Alternately, if you're going to be wearing your costume somewhere they are very paranoid about weaponry, you might want to permanently embed your arrows in your quiver using expanding foam or some such. | |
If you want to tip your arrows, you can do so with craft foam. Our goal here is to make safe costume arrows, so we are NOT going to sharpen the tip of the shaft - leave it blunt! You may not be able to make a super-screen-accurate arrow this way, but it is simple and safe. Make a template for your foam point, leaving a space in the middle for the arrow shaft. Cut out your foam pieces. |
 |
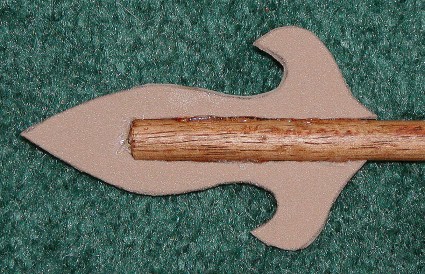 |
Glue the foam piece to the shaft, making sure you glue it parallel to your nock. |
Paint the whole tip as desired (I use flexible fabric paint so it can bend with the foam and not crack). |
 |
Done! It takes a bit of time, but wasn't it easy? Now you can smile and say "Oh, those? I made them myself." ;) | |
Time for Auntie Pen's closing nag. Remember - you've made real arrows here! Even though they're blunt and foam-tipped, they could still hurt someone if shot at them with force. Never, ever notch one to your bowstring - just mime it if you need to pose, holding the arrow outside the string! | |

